It’s -15 degrees Celsius and snowing outside? Get out and hike!
It’s winter here in Canada. Yeah it’s cold out, but so what? If you dress for the weather outside, you’ll be a comfortable and happy hiker while you’re out on the trails.
The Concept
Layering is key when it comes to spending long periods of time outdoors doing physical activity during the cooler winter months. By dressing in multiple lighter layers, you’ll be able to adapt to fluctuating weather conditions and quickly manage any changes to your body’s temperature.
The idea is that after you’ve been moving around for a while and have generated a fair amount of body heat, take a quick break to remove a layer (usually the mid layer). This will cool your body down before you start to sweat profusely and drench your clothes.
Having wet clothes while you’re outdoors in the cold of winter is the last thing you want. After your clothes become wet, the cold air will begin to cool them down quite fast. When your clothes are wet and cold, you become wet and cold. At that point, it’s very hard for your body to maintain warmth. This can potentially lead to hypothermia.
The Materials
There’s the age old adage that states cotton kills. While your favourite, comfy 100% cotton blend t-shirt won’t sneak up and try and stab you in your sleep, it will lose all ability to keep you warm when it becomes wet. Cotton takes a very long time to dry when wet, as it absorbs sweat or water rather than “wicking” (pulling) it away from your skin to the outer surface where it can evaporate. This is obviously not ideal.
Enter your new friends – wool and synthetic garments. These materials will wick away sweat from your skin, they dry quickly and they will still insulate when wet.
Materials: Polyester and Wool; the two materials you’ll want to get more acquainted with.
The Layers
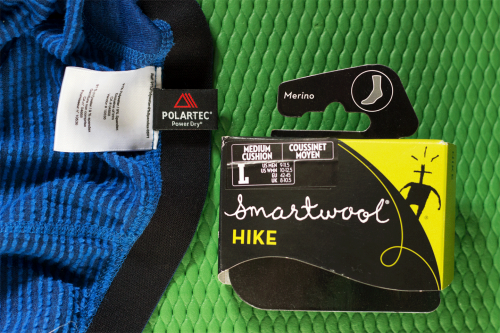
- The Base Layer. This is the layer that sits closest to your skin. The base layer is responsible for wicking away any moisture from your skin. With this in mind, it’s a good idea to cover up in base layer garments from the neck down. Firstly, go and grab some good old long johns! Also known as thermal underwear, you’ll want to throw on a long-sleeved top and a pair of bottoms. These can be found in both wool and synthetic materials (ex. Polartec Power Dry®). For winter activities, there are three different weights available; light, mid and expedition (the heaviest used for the coldest conditions or low activity). Choose the garment weight that will best suit your upcoming hike. Next up, pull on a good pair of hiking socks (ex. SmartWool) to keep your feet dry and warm. Tip – Always bring at least one extra pair of socks with you. Always. Wet feet are horrible to hike with. On top of sucking out precious body heat, wet socks create optimal conditions for blisters to form. If your socks become wet, swap them out for a dry pair.
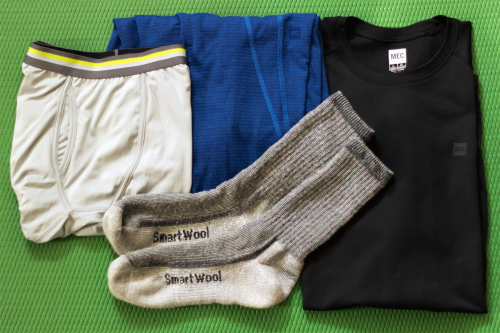
Base Layer: Underwear has never been so high tech. It’s like you’re wearing a piece of the future.
- The Mid Layer. This layer helps provide you with warmth. The mid layer will be thicker than your base layer. It should fit comfortably (not baggy) and it shouldn’t restrict movement in any way. A popular option here is fleece, but wool also works well. The mid layer is the layer you’ll be removing to cool down and then putting back on again to warm up when you slow down or stop. For this reason, you’ll probably find that a fully zippered top is the most efficient option.
Mid Layer: Use your escaping body heat and some insulation to stay warm. GO SCIENCE!
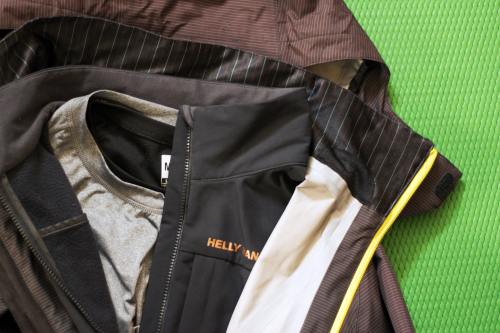
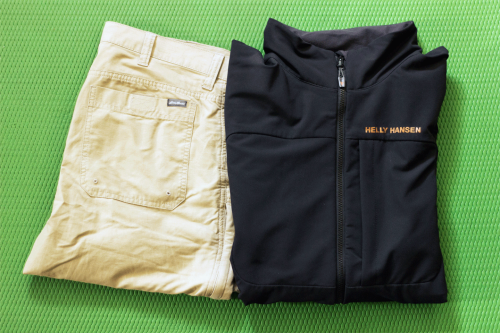
- The Shell Layer. This is the layer that keeps the wind and snow out. That being said, the shell layer should be weatherproof; windproof, waterproof and breathable. Over the years, a few reliable technologies have popped up that perform very well in this manner. Probably the most well known and most widely used is Gore-tex®. For your upper body, you’ll want a good quality hard shell jacket. For your lower body, a pair of weatherproof or weather-resistant pants will do nicely. These will be large enough to fit over top of the layers beneath them. Sometimes, you’ll need more ventilation to cool down during your hike. A lot of jackets and pants have ventilation zippers built in that you can quickly open up to let out a bit of that increasing heat.
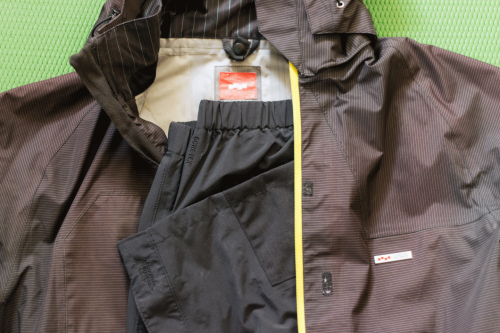
Shell Layer: Slap Old Man Winter in the face. Throw on a weatherproof shell.
- The Extras. Lastly, you’ll need to cover up your head and your hands. Again, you’ll want to stick with synthetics or wool. For your head, you can use a thick wool toque or a thinner polyester toque; it’s up to you. To cut the wind on your noggin, pull up the hood of your shell jacket. Optionally, you can wear a neck gaiter, balaclava or face mask to keep your neck and face warm. For your hands, you can grab a thin pair of glove liners and then slip on a larger weatherproof pair of gloves over top. Remove and add these layers as needed. Personally, my gloves are the first layer that I remove even before my mid layer. I have found that once my gloves are removed, I cool down nicely and my body maintains a balanced temperature. Something else to consider bringing on your winter hike are those little chemical-based hand and toe warmer packs. They may come in really handy if you’re in need of some instant heat. As a bonus, they’re very light and easily fit in pockets.
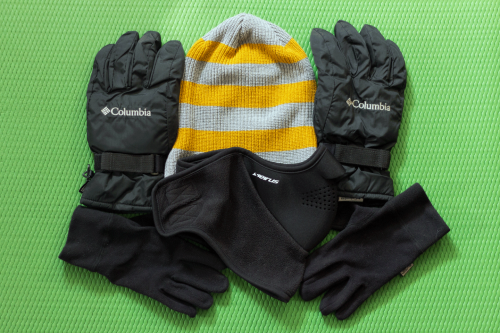
Extras: Don’t allow frostbite to ruin your day. Keep those extremities toasty warm.
Final Thoughts
Put these layering concepts to good use this winter and head outdoors to enjoy those stunning, snow-covered landscapes. You won’t regret it.

Copyright © 2015, Ben Aerssen. All rights reserved.


